What is a Track?

Visible ConfusionThe more conversations I have about audio, the more I see ways that seemingly simple things can be confusing, like how the overused word “track” means wildly different things in different contexts.

A track often means a song, as in “Hey have you heard that new track by The Weeknd?” However, we don’t really call songs on vinyl or cassette ‘tracks’, yet each song on a CD is a track and each of the four stereo sections of an 8-track is a ‘track’. Go figure.

Track is a verb too, as in “I’m going to be tracking guitars later this afternoon,” which means recording guitars to tape or digital files. On a recording tape, there are as many tracks as there are channel strips on the recording desk or console, for instance, 24, 48, or 128. In a Digital Audio Workstation or DAW, the number of channel strips is limited only by your computer’s hardware specs.

A track in the audio engineering world usually means a single file of recorded information, like a guitar track. This file goes into or is recorded into a channel strip, which is also sometimes called a track. “Let me import these tracks and get mixing.” This corresponds to the way Digital Audio Workstations mostly mimic the workflow of analog recording consoles.

I’ve even heard the word track used in the context of the main song mix before the vocal goes in, as in “let’s see how well this vocal sits in the track”. This implies that the song is a fully functional piece without the vocal, as in an instrumental track.

It’s no wonder things can get confusing quickly, it often sounds like we’re speaking the same language but we may be talking about different things!

Are there any other ways you have heard the word track used in the audio world?

Sharing is caring!
Share

Mixing with Mystery Plugins

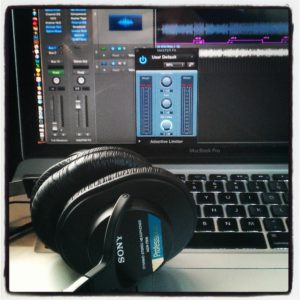
Mixing + HeadphonesIt seemed like a good idea. Why not add a challenge on top of a challenge, I thought?
I know we all have a set of go-to plugins, while the rest sit in a virtual junk drawer of tools that have either been abandoned or never got used in the first place. So I thought hey, why not switch it up and just use some of those for a change?

And just like that, my practice mix became a challenge to use only plugins that I own but have never used before. How hard could it be, I thought? I’ve been doing this for a decade.

Heh.

This mix was originally just going to be a test of a new version of my mix template, which I update a couple times a year. This version has some new bus routing based on the way Michael Brauer does some of his bussing, at least according to the workflow in a recent Tape Op article. Mixing with this routing would have been challenging enough, as it turns out.

What I quickly figured out was that not only was my workflow hamstringed by taking out my go-to plugins, but having to either figure out what each plugin did and how it sounded was going to make this mix take at least three times as long as usual.

So I stepped back and thought, how can I make this process as workflow-y as possible, while knowing virtually nothing about these plugins?

The answer may be instructive, so stick with me.

I took a step back and thought, ok, what are the types of plugins that I use in every mix? And came up with a short list:

• EQ for correction and color
• Track compression and bus compression
• A trim plugin
• Saturation
• Metering
• Reverb and delay for flavor

That’s pretty much it. And not even all of those are necessary, but they’re part of my typical mix workflow.

The next job was to find unused plugins that fit each of these categories. Some of them I literally had to try out to see what they were because I couldn’t even remember downloading them, let alone what they did. As in, were they a bus compressor or a transient shaper? A synth or a drum enhancer? There were definitely some surprises, both pleasant and not.

(Hint to plugin makers – it doesn’t hurt to say what the plugin does in the name!)

Once I cleared my template of my regular plugins and replaced them with the mystery ones, it just became a matter of figuring out which ones did the job and which I could just disable or delete.

The mix eventually came out sounding the way it would have with my regular plugins and workflow, but now I have a new set of cool tools in my mixing toolbelt and a few less losers taking up space in the pulldown lists.

The bottom line: we get caught up in gear acquisition (ooh shiny!) and tend to acquire tools faster than we learn how to use them. It doesn’t hurt to clean house once in a while. And when you do get new toys, take the time to learn how to use them!

The mix:

Sharing is caring!
Share

Mojo’s Pick of the Week – Dragonfly Black DAC

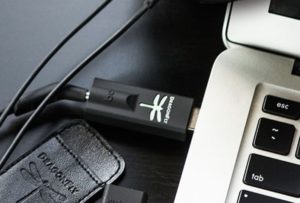
DragonflyThe Dragonfly by Audioquest is a pro quality Digital Audio Converter and headphone amplifier for converting your digital music to analog for a much richer, truer listening experience. It plugs into your USB port (adapter available), and comes in two flavors, Black and Red, at price points of $99 and $199 US respectively. There are some differences outlined here, but essentially the Red is the higher end version (and a bit out of my price range). The Black is still well worth it.

Essentially, this plug & play DAC takes over for the built-in audio output of your computer, which is not necessarily optimized for sound. I’ve been mixing in the box for many years, and I was just listening to a long interview with Andrew Scheps talking about how much he loves mixing in the box for all the reasons I do. At the very end, he said “but don’t use your built-in audio out, it’s built as an afterthought and not optimized for high end audio”. Which believe it or not, has never occurred to me. I did notice sound was richer when listening through my Presonus AudioBox out instead of my Mac but because I don’t always have the AudoBox with me, that just wasn’t a practical option.

Enter the Dragonfly.

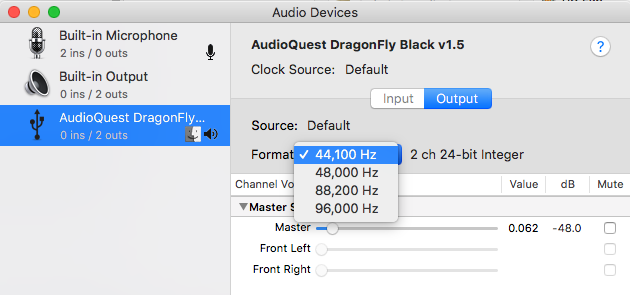
Note: when I first plugged it in, it was LOUD. I mean, throw your headphones off loud. So set the Dragonfly’s output volume before listening through it. Once I set the volume (easily done in the menu bar or the sound Preference Pane), I opened the Audio-Midi Setup App* and tried it at all sample rates before setting it at a conservative 24/48K.

Sample rate Dragonfly

Very cool feature: the Dragonfly LED changes color to indicate what sample rate it is processing. This is true even if it’s set to one setting and your DAW is set to another, it will switch to reflect the current output. Easy way to tell at a glance what your session is set to.

One thing I did notice: it’s better for mixing than tracking; I had noticeable latency when tracking through the Presonus and listening through the Dragonfly. Too many converters, I’m thinking.

To be honest, I’m still getting used to hearing music through it, the range and depth is expanded in every dimension. But it’s definitely a game changer for me. I feel like I can feel the air from kick drums now!

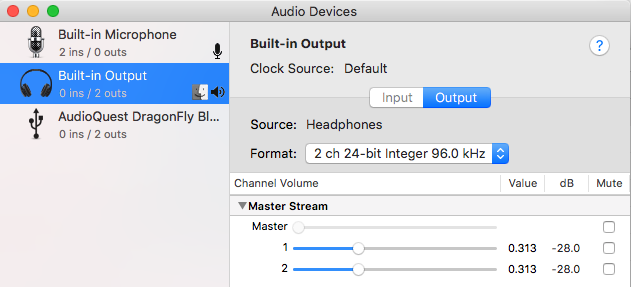
*Something I discovered in the process of setting it up that was very cool and somehow NO ONE HAD TOLD ME before is that you can set your built-in audio out from the default 24-bit/44.1K to up to 32-point/96K. I don’t mean the Dragonfly, I mean your actual MacBookPro audio out. I can definitely hear a difference between 44.1K and 96K even streaming an MP3, so if you do nothing else, do that. This is set for your default audio out using the Audio-Midi Setup application under Utilities.


Sharing is caring!
Share